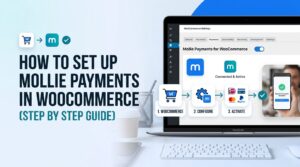

How to Set Up Mollie Payments in WooCommerce (Step by Step)

Setting up Mollie in WooCommerce takes about twenty minutes when you know the order of operations — and a frustrating afternoon when you don’t. We configure Mollie on client stores almost every week at our agency, and the problems are nearly always the same three: starting the plugin before the Mollie account is verified, mixing up test and live API keys, and forgetting that payment methods must be activated on Mollie’s side before they appear in WooCommerce. This guide walks through the whole Mollie WooCommerce setup in the right order.

Why Mollie for a European store

If you sell in the Netherlands or Belgium, Mollie is the pragmatic choice: it covers iDEAL (now appearing as iDEAL | Wero as the Dutch banks migrate to the European Wero wallet), Bancontact, credit cards, PayPal, Klarna, Apple Pay and SEPA transfers from a single contract, with no monthly fee — you pay per transaction. For Dutch consumers, iDEAL isn’t optional; a webshop without it looks broken to local buyers.

Before you touch WordPress

Do these first — they have waiting time built in, and the plugin can’t do anything useful without them:

  1. Create your Mollie account at mollie.com and complete the onboarding: business details, bank account, and identity verification (KYC). Until verification finishes, you can only make test payments. Verification is usually same-day for a Dutch KvK-registered business, but plan for it.
  2. Activate your payment methods in the Mollie Dashboard under Settings → Website profiles → Payment methods. Tick iDEAL, cards, and whatever else you need. Methods not activated here will never show up in WooCommerce — this is the single most common “Mollie isn’t working” cause we see.
  3. Copy both API keys from the Dashboard (Developers → API keys): the test key starting with test_ and the live key starting with live_.

Step 1 — Install the plugin

In WordPress, go to Plugins → Add Plugin and search for Mollie Payments for WooCommerce (by Mollie itself — check the author). Install and activate. It’s the official, actively maintained integration; skip the third-party alternatives.

Step 2 — Connect with the test key

Go to WooCommerce → Settings → Payments → Mollie. Paste your test_ API key and enable Test mode. Save. The Mollie payment gateways now appear in your Payments list — enable the ones you activated in the Dashboard (they only appear if step 2 above was done).

Step 3 — Place a real test order

Don’t skip this. Open your own shop in a private browser window, add a product, and pay with iDEAL in test mode — Mollie shows a fake bank screen where you can choose “Paid”, “Failed”, “Canceled” or “Expired”. Check all four outcomes once. After each, confirm in WooCommerce → Orders that the order status updated correctly (Paid → Processing, Failed/Canceled → the order returns to Pending/Cancelled).

If orders stay stuck on Pending after a “Paid” test, Mollie’s webhook can’t reach your site. The usual culprits: a maintenance-mode or “coming soon” plugin blocking requests, a security plugin or firewall filtering them, or a staging site behind basic auth. Fix reachability before going further — this exact symptom is one of the most common WooCommerce checkout problems we get called in for.

Step 4 — Go live

Once test orders behave: replace the test key with your live_ key, switch Test mode off, and save. Place one real order yourself for a small amount and refund it from the Mollie Dashboard afterwards — a 30-second sanity check that has saved us from embarrassment more than once.

Settings worth changing from the defaults

  • Order status for cancelled payments: decide deliberately whether a cancelled iDEAL payment should cancel the order or return it to Pending so the customer can retry. For most stores, Pending is friendlier.
  • Payment surcharges: resist adding them. They irritate customers, and for consumer payments in the EU, surcharging most common methods is restricted anyway.
  • Description in bank statements: set a recognisable statement descriptor in the Mollie profile — unclear descriptors cause chargebacks and “who charged me?” emails.
  • Currency: Mollie pays out in euros. If your store runs multiple currencies, check method availability per currency before promising customers anything.

The pitfalls, summarised

Method missing at checkout → not activated in the Mollie website profile. Orders stuck on Pending → webhook blocked. Payments work then suddenly stop → someone pasted a test key into production during debugging (check the key prefix). Checkout goes blank after installing Mollie → almost always a JavaScript conflict with another plugin, not Mollie itself — a topic that deserves its own guide, coming shortly.

Wrapping up

The order of operations is the whole trick: verify the account, activate methods in the Dashboard, connect with the test key, test all four payment outcomes, then swap to live. Twenty minutes, no surprises.

Need this set up for you properly? Intec Infosys handles WooCommerce development, payment configuration, and custom solutions — this is our day job. Or read more about who writes these guides.

INTEC INFOSYS • AGENCY DIVISION

Need this set up for you?

XynHost is written by the team at Intec Infosys. If you would rather have this implemented properly than do it yourself, that is what we do all day.